

 4006
4006
Well, I had a go at it, but it does not work with a stipple fill. It knew it does work with a normal fill.
So I did it a different way.
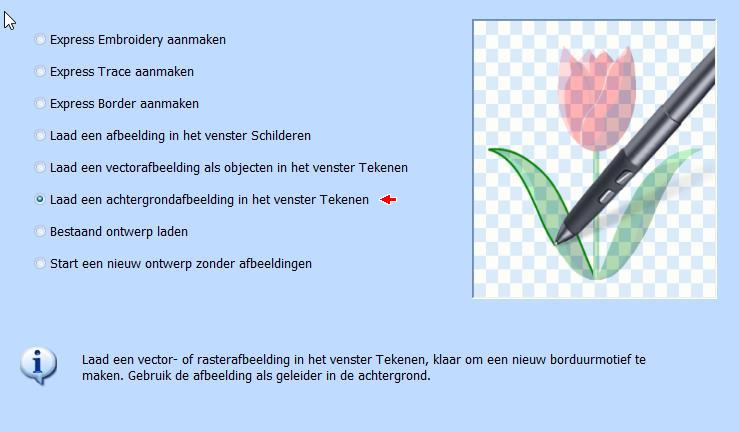
- I started with a picture of the design and used that in Design Creator.
Unfortunately my 5D is set up in Dutch, but see the arrow in picture #1.
- In the Draw section draw a line around the design with the drawing tool and make a square or rectangle the size you want a design. picture#2
- Go to the design tap and using the draw by hand tool - see arrow1 - design a large block using the outer drawn line and choose your settings. In my case a distance of 4 mm and a stitch length of 2.5 mm.
- use the "make opening by hand" tool - arrow 2 - and digitise along the inner line. You can edit the points and instantly see how that affects the fill. picture #3
- save the .can file and convert to stitches.
- open the design in Embroidery (Plus) and import your chosen design. See mine in picture #4.
- Having saved the .can file you can go back to Design Creator and alter the inner line to get your stipple closer to the design if you wish.
 [2]
[2]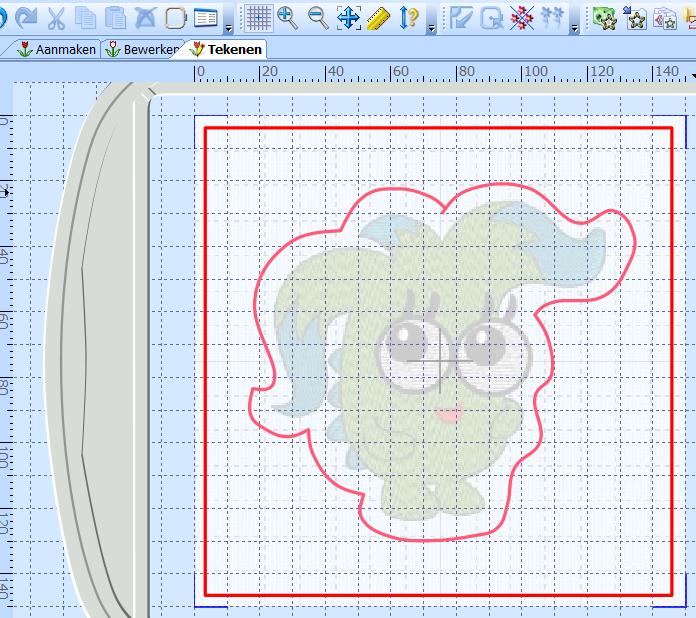 [3]
[3]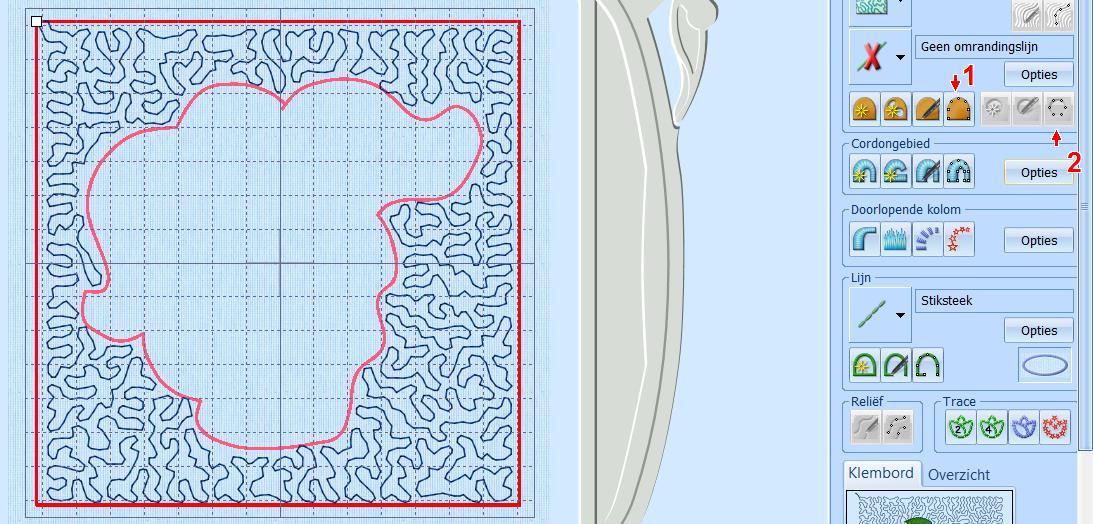 [4]
[4]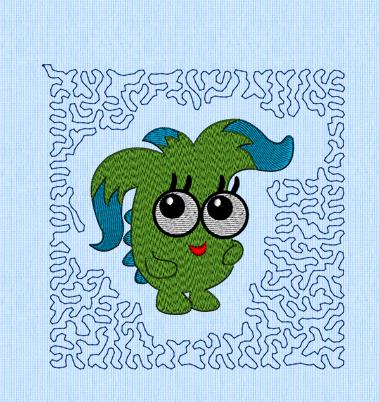
 145191
There is no way to do that more or less automatically, but you can do it by playing with the program.
1. In Design Creator create a square the size you want it to be and use meander/ stipple for the fill. Use the settings to get it as wide or as narrow as you will. Save the design (stipple) and copy it to Enbroidery (plus) .
2. Open the design you want in the middle and enlarge it so it is 4 or 5 mm bigger on all sides. Save the design under a new name (design-stipple) land choose Remove underlying stitches (or overlap - mine is set to Dutch, so I don't have the exact wording. Copy it and go to
3. Stitch Editor (Plus) and paste the design. Walk through the colours and remove all except the stipple one.
You are now left with the stippling that has a hole in the middle a bit wider than the design you wanted to use. Check the design and see if you need to correct points around the inner outline,
Save the design ( new name, stipple-hole1) n, copy it and paste it in Enbroidery, add the original design ( not enlarged) and center it. Combine the two when you are satisfied with it and save it with ( stipple block 1) . The orinigal stipple can be used to make a number of blocks with different designs in it.
Make sure you save the different steps with there own names, so you don't overwrite anything you want to keep.
I am working on my iPad so I can't show any pictures, can do that tomorrow.
Writing it takes longer than actually doing it.
Thank you Arsenio for asking the question and Thank You mops for answering it, especially giving such clear instructions. I have been wanting to do this but never could figure it out. It never occurred to me to just ask....LOL. I have PEDesign but I do not see a problem in doing this. Thank you both.
I will add my thanks, also. You give very clear, concise instructions and i am going to give it a try tomorrow.
 by arsenio
23 Mar 2014
by arsenio
23 Mar 2014
Mops I have tried, tomorrow I will stitch and see how it looks.
God bless and thank you.
145191