getEdited - SELECT
by pldc ( edited 06 Jan 2015 ) 06 Jan 2015

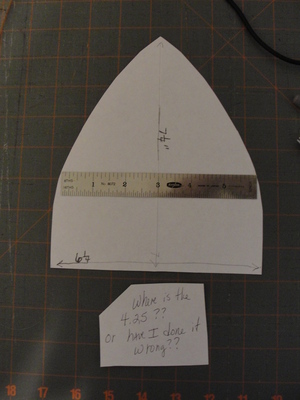
this is a hat tutorial for Toogie & anyone else who may be interested in how I did my fleece hat

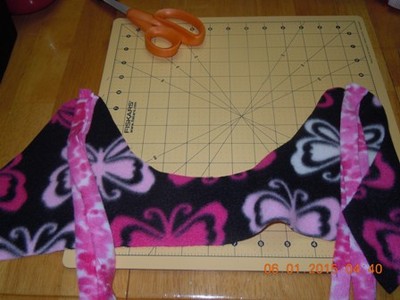
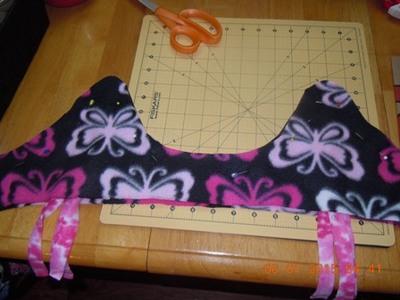
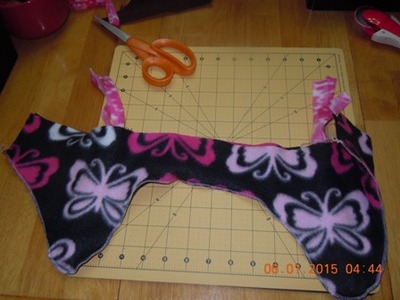
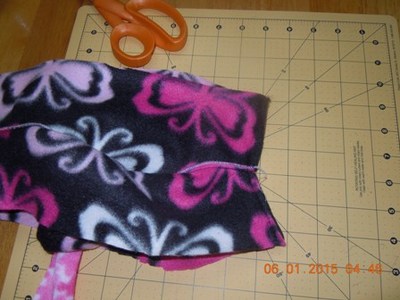
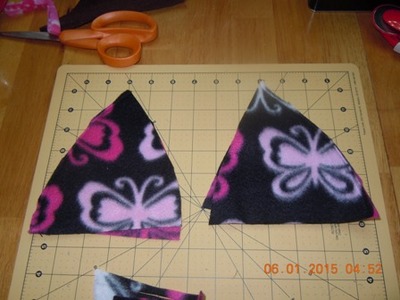
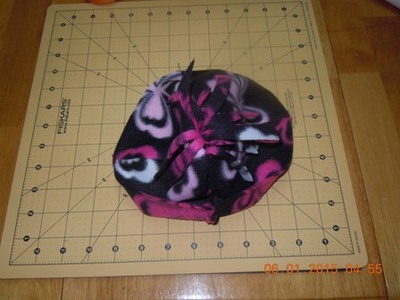
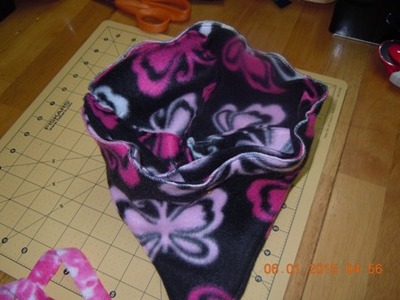
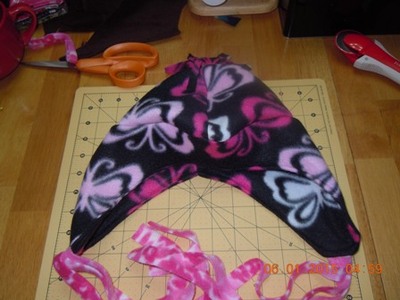
#1 first off cut four triangles mine is 6.25 inches long & 7 .25 high in the middle & the width 4.25 tapered to the very top #2 is the bottom half of the toque which the length is the width of your head plus .5 to 1 inch more cut two of these on the fold. The fold is the front part so no seam shows there. the back is longer then the front as shown is pic #2. On the right side I took a dinner plate to create the circle & cut it out. The back pc is 2 inches but could be a little longer. The flap for your ears is determined by the placement on your head so measure from the back of your head ear to ear divide by 2 & that is the length down to the ear then I used a cup to round it off. #3 if you use dimensional fabric pay attention to placement here. Remember to cut the bottom half front part on the fold & cut two of them. Pic #4 is the ties they are 3 inches wide by 12 inches long cut into 1 inch strips.#5 I cut a smaller pc into strips for the tassel #6 I stitched the tassels down first. #7 lay the other bottomhalf on top of that & stitch around leaving both ends OPEN. #11 fold bottom in half to join the ends together creating a circle. #12 Fold in half long ways & flip right side out #13 Top stitch @ the top & bottom to create a nice finishing seam. (I serged everything together then top stitched it for added strength) #14 take two pcs of the top hat & sew along one side then do the same with the other side #15 open one half of the top hat & sew the tassel inside keeping all tucked in so as not catch loose ends #16 sew both halves of the top hat together #17 turn inside out & take bottom half of hat & turn inside out too place top half into bottom half & sew all the way around #18 turn right side out & top stitch the seam down where the join for the top & bottom meet. #19 all you have to do now is make the braids & your done! I hope these instructions are helpful & if you have any questions please feel free to ask I will help as much as I can

299557

by KCowden 08 Jan 2015

Thank you!!! I can certainly use this!!! You make it look so easy with your step by step instructions and photos....thank you!!!

1 comment
pldc by pldc 08 Jan 2015

ah thanks I am glad that it is ok, I hope that you can make one with these instructions

3385
by pldc 07 Jan 2015

To make my pattern, first I measured my head, it is 20" exactly. To make the pattern for the ear flap, I added 1/2" to my head circumference (for seam allowance) then divided that number by 2.
20.5- 10.25
I drew a line 10.25 on my paper. Then I drew a 2" line down from one end, a 2.5" line down on the other end and a 4.5" line right in the middle.
The side with the 2.5" line is the back, the 2" side is the front and will be on the fold when you cut out your pattern. I hope that this helps you out Toogie

299557
by pldc 07 Jan 2015

The top of the bottom pc to the bottom of the ear measures finished 6 inches. if you measure around the back ear to ear pic(#2 shows the back part) & then curve half of the measurement from ear to ear down. so say from ear to ear is 5inches then take 2.5 (your pattern pc is on the fold) I hope this is a help to you. I am off for dinner but will check back soon

299557
by toogie 07 Jan 2015

I started working on my pattern. Tell me if this part is correct or please correct me. Enlarge the photo so you can see my measurements. I don't know if these are correct and I'm not sure where the 4.25 comes in. Also, about what length is your ear flap band? Is the 2 in band, you spoke of, included with the ear flaps here, because in the photo it looks larger than a 2 in band/strip?

2 comments
pldc by pldc 07 Jan 2015

the 4.25 is where your ruler is. The rest looks really good. Fleece is pretty forgiving too so it has some stretch.

pldc by pldc 07 Jan 2015

I will check the ear flap brb

108941
by lhart 07 Jan 2015

Your hat is so cute, thanks for the tutorial!

1 comment
pldc by pldc 07 Jan 2015

your very welcome. ~hugs~

3290
by marianb 07 Jan 2015

Thank you Loralye you make it look easy..

1 comment
pldc by pldc edited 07 Jan 2015

Your quite welcome Marian, it was a bit of a challenge ~hugs~

45917
by 02kar Moderator 06 Jan 2015

Thanks for giving us the directions and the attemps to show the pictures of how to do it. It isn't easy to do this so it is very appreciated.

1 comment
pldc by pldc edited 07 Jan 2015

Your quite welcome Karen, I hope they are ok? ~hugs~

168881
getEdited - SELECT
by pldc edited 06 Jan 2015

ok I will do my best to put up more photos in the right order

2 comments
noah by noah 06 Jan 2015

I have decided it would be better if you just made me one lol

mommajo by mommajo 06 Jan 2015

I agree with noah. That is the only way for me to get one now

299557
by toogie 06 Jan 2015

Thanks for the info but the photos do not appear. Maybe it was too many at once. Try loading 3 or so,making sure that loads, then edit and add 3 again until you get them all up.

5 comments
pldc by pldc 06 Jan 2015

oh yikes ok I will try that I am sorry

pldc by pldc 06 Jan 2015

yikes now the top photos are not coming in again?

pldc by pldc 06 Jan 2015

ok I got the top back but now the bottoms are gone. I either have to shrink the photos or make two instructions?

pldc by pldc 06 Jan 2015

ok they are all up I just hope the order is still ok

toogie by toogie 07 Jan 2015

There are 15.

108941