




2164✽
This is how I make my fabric cards.
First I get all my materials needed for project ready. Stablizers, fabric etc.
1 images:
[1]

Comments (18)
2164✽
I'm loading each picture with a description of what to do.
2 comments
wished you would have numbered them.
Sorry, i thought with them in order from bottom to top was putting them in order?
2164✽
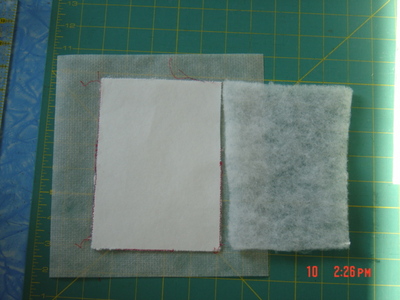
Here i cut my stablizer and batting ready to load in hoop. If you look closely I made a template with tear away stablizer, this i use to cut my batting or sometimes i use it to cut fabric so it fits just inside the stitching area.
2164✽
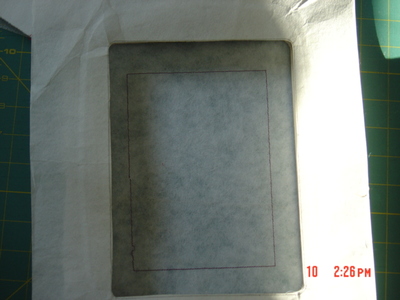
This is a cutout of tearaway, i use this to spray my adhesive. I just learnt this so you don't get spray adhesive on your hoop. I messed up my hoops already, need to get them cleaned. You lay this on hoop after you loaded your stablizer, then spray adhesive.
2164✽
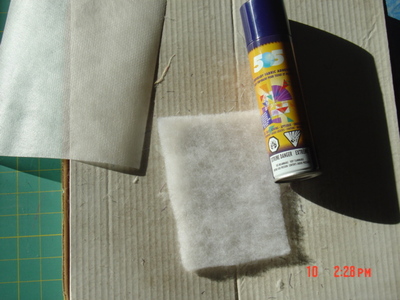
This is a pizza box i use to spray my adhesive for batting , fabrics or stablizers.. I used it quite often as u can see box looks yucky and very sticky LOL this way you have one area where u spray all the time, not making a mess around in your sewing room
2164✽
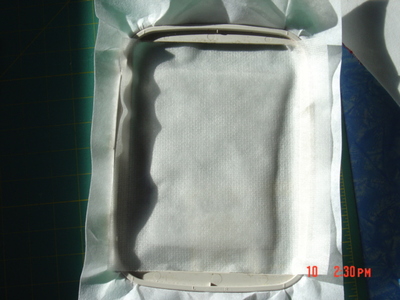
My stablizer is in hoop and on top is the sprayed batting and top stablizer to hold batting in place while i do my first placement stitches. Notice the top stab. is larger the stitching area, trim after placement stitches are in place, or wait till you put the top fabric, then trim off together.
2164✽
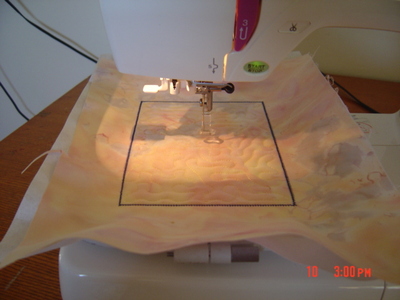
fabric is in place, do the stitching around to hold all layers down together. Here its at the third stitching, loose zig zag, just before the final satin stitching. with this pattern I added stippling, i don't do always (stippling)
1 comment
Here you can start trimming fabric and other layers underneath, just as careful as you can NOT TO CUT ANY THREADS OFF. Leave in hoop. Load another hoop for back of card.
2164✽
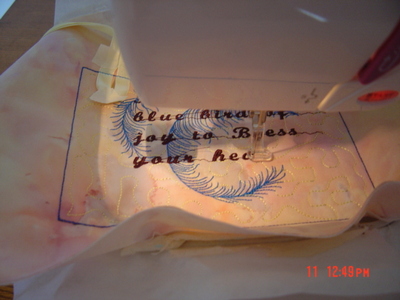
this is second hoop, repeat as you would front of card, with stablizer, fabric. Add more embroidery or you can leave it plain..depends on your own designing. I like to add more , but then again, i'm one of overing doing sometimes with emblishments LOL.
2 comments
Here when i did my own font, its was only to fit on a 4x4, my cards are done in size 5x7. So after i did all the stitching around, including stippling. I had to remove it and added to another hoop with stablizer. If you look real close on bottom of hoop area u can see I used masking tape to hold top fabric, while it stitched font.
on bottom of hoop I used masking tape to hold top.
2164✽
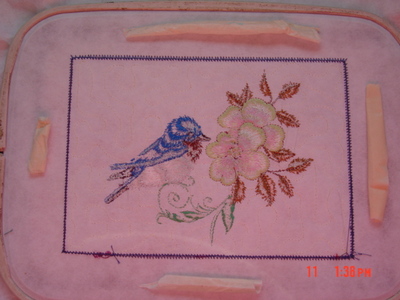
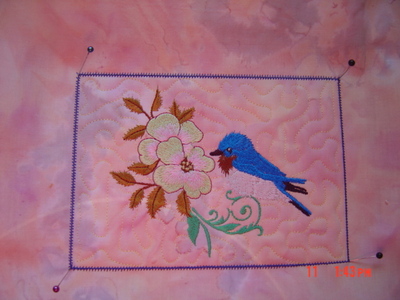
I flipped my hoop over to place masking tape, on first hoop (front of card) then second picture you see I used pins to make sure my corners match perfectly. Keep moving till you see that the stitching is lined up properly. I used my window when its sunny out, of just use your own judgement.
2164✽
Then i put hoop back into machine, and i go back to beginning of stitching of square around to hold both parts together, I even go around twice to make sure it doesn't come apart when i do my final trimming. Now you trim very close. STILL ON HOOP, DONT REMOVE YET. STILL NEED TO DO FINAL SATIN STITCHING TO COMPLETE CARD.
1 comment
TRIM FABRIC OFF BOTH FRONT AND BACK, ONCE THAT IS DONE, YOU RELOAD HOOP AND DO SATIN STITCHING TO COMPLETE CARD. REMEMBER THIS IS STILL CONNECTED TO HOOP WHEN DOING FINAL TRIMMING
2164✽
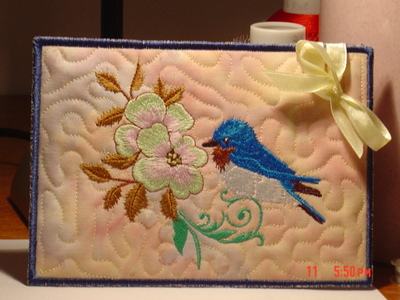
TA DA lol then she is complete. I didn't trim it very good this time, was getting tired and afraid to mess it up LOL but look at back of card and you can see how i added the ribbon. I think i'd do it different next time. Hope my information makes sense. If you don't understand, let me know and i'll do my best to help you. Thanks for looking and thank you for enjoying my cards, HUGS DENISE.
3 comments

Beautiful
Thank you rw9340
ttt

360672✽
wow it is Awesome i am still trying to do these i need some different paper besides what Walmart has ??great job hugs carolyn
1 comment
Thanks Carolyn.

89895✽
Just lovely made and thanks for the photo lesson.
1 comment
Thank you capoodle, your very welcome for the photo lesson, my pleasure.:) HUGS

18403✽
Hurray!We now have the photo instructions.Tu and happy valentines day to you.
1 comment
HI shilly, your very welcome, Happy Valentine to you too. If you have any questions, just ask. :) Hugs
7153✽
Thank you for sharing your tutorial. It is really a help.
1 comment
your welcome joyce05, this is my first tutorial. :) hugs
78119✽
Great tutorial, great job! Hugs, Lidia
1 comment
thanks Lidia, ;) hugs

25531✽
THANK YOU !!!!
1 comment
Your welcome obaachan.

211088✽
18403✽
Trying to keep the tutorial close to the previous post of the card...
1 comment
shilly i sent you a pm hugs denise.