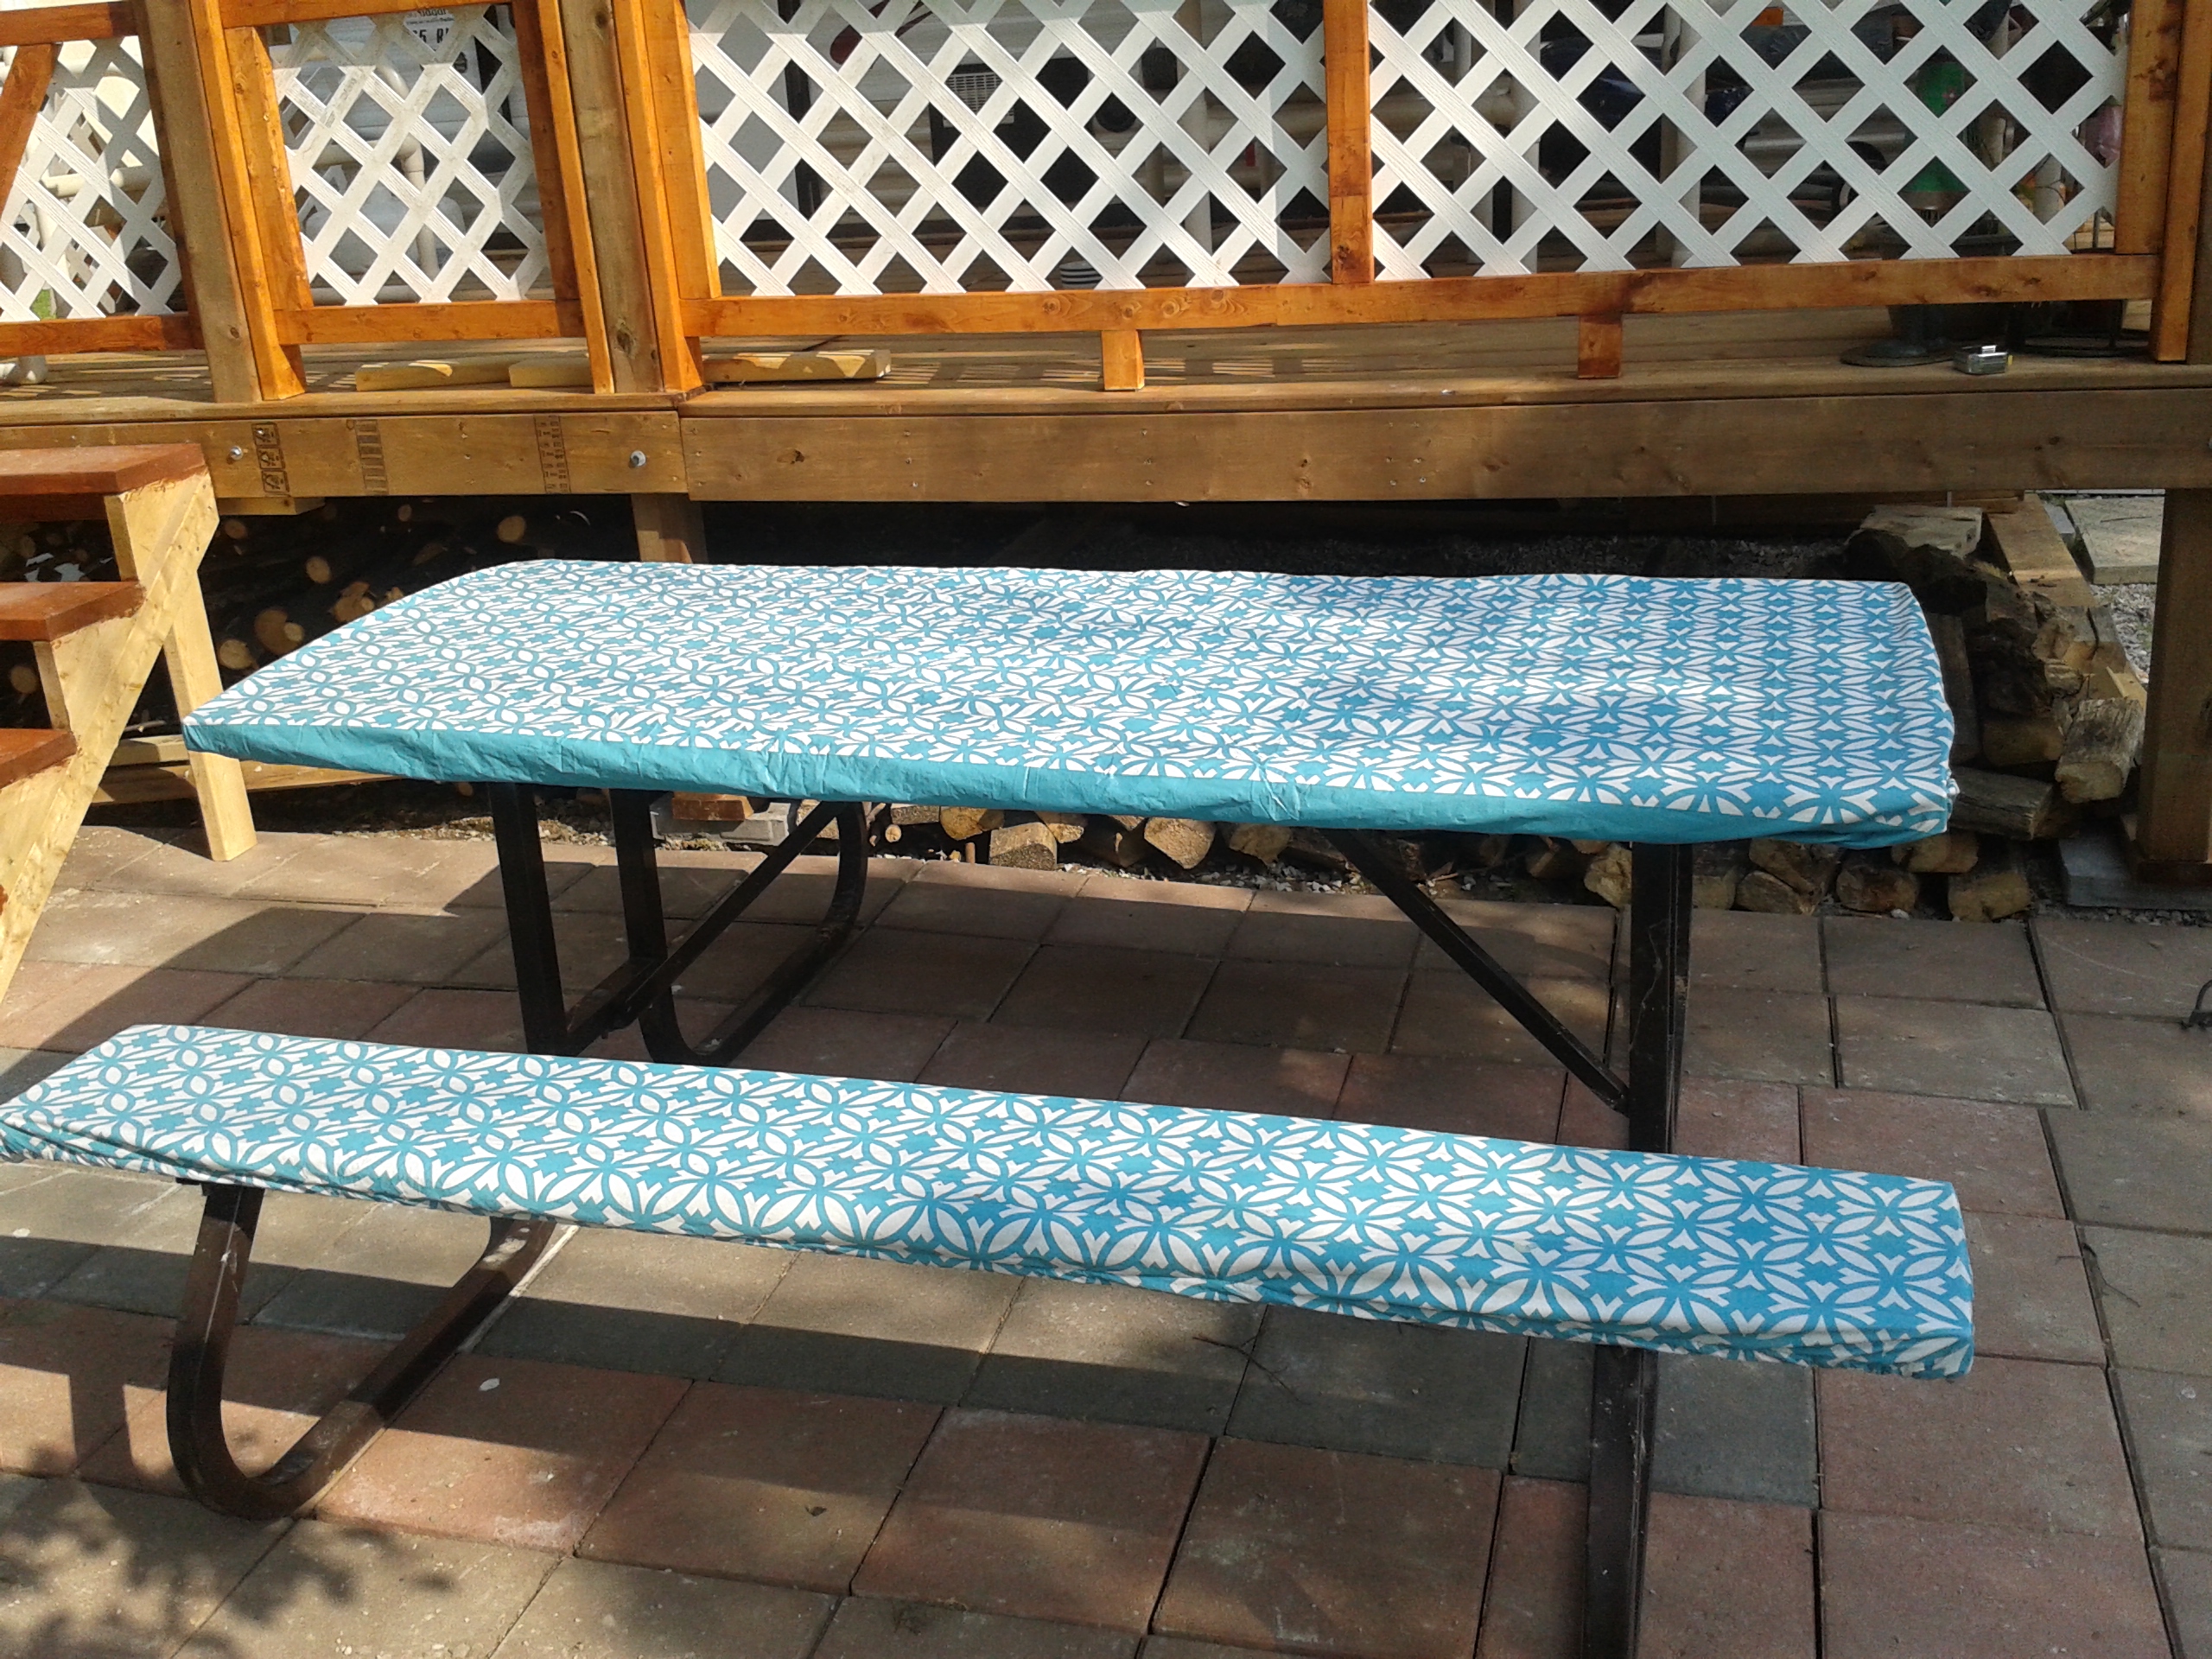
by pldc ( edited 06 Jul 2015 ) 06 Jul 2015

We were out @ the camp site again today & I was able to finish up making the cover for the picnic table & the benches. For those who have asked: what I did was measure the table top from side to side & then the length of it & the same for the benches. Be sure you measure the sides too. Take this measurement & add an inch or so. If you buy fleece backed tablecloths you need 2 & they have to be bigger then the 50 x 70 which I think is the standard size @ the dollar stores, unless your lucky enough to find bigger maybe Wal~Mart? I bought mine 60 x 80. My table benches: I cut in half length wise then cut in half lengthwise again this gave me enough to make both bench seat covers & had half of it leftover so I could really make 2 more bench seat covers from this. I stitched a casing all around it & since I was using a 1/4" elastic my casing was about 3/4" & left the opening & threaded an elastic through then stitched the elastic ends together. For the table I did much the same my size was about 44" so I cut 16" off the sides but kept the length & did the same as the benches. I have thought about this & what you could do if you aren't sure of the size is use cording instead of elastic & one of those bobs things for all three pieces. Then you can pull the strings on any size table & it will automatically fit. I am attaching a photo of the bob thing I am talking about as I have one attached to my coat. Unfortunately I can't tell you anymore about this as I have given the wrapper to a lady who has ordered one from me. Rather then me buy the tablecloths I sent her out to buy the pattern she liked best. I bought mine @ Giant Tiger for $5 each. I much prefer this to the wooden table & I have in fact seen people staple a smaller cloth to their table too. I went with a pale background instead of a heavy print because this table is left out in the sun so it will fade & the red one is on our deck & mostly covered by the awning. I will point out that while this is a great & tidy idea the table that we got on our site was quite rough & I did have to sand it down & putty it in 2 spots so that it would not rip the cloth as soon as I tried to fit it. That's why it took me longer to make then the red one. Another tip I learned after making the round one is when you make the casing it is ok to leave an opening (for elastic only) in more then one spot it helps when you are threading the elastic through the casing your pin catches the fleece & will stick a little so if you have an opening left on all 4 sides you can then pull the elastic through the holes a quarter of the way around it. Much easier to do then pull it all @ the end. I used about 1.75X for the elastic. So the measurement of the table but only 1.75 of that

299557

by kalamazoo 08 Jul 2015

Really like the covering. The elastic seems to make it very versatile as the benches in the parks aren't always the same size! I should get to work on a set for our camper.
Thank you for your clear instructions!
Cindy

1 comment
pldc by pldc 08 Jul 2015

Ah thank you Cindy I am thankful my instructions are ok. ~hugs~

2346
by bahet21 08 Jul 2015

I think that you did great with the tablecloths. I have also seen them done that way. I have put the tablecloths together like you have done, but I put straps that I can tighten on the end of the bench and top. That way I can use the same tablecloth on all length of picnic table (4 foot to 8 foot).

1 comment
pldc by pldc 08 Jul 2015

a wonderful option, Welcome to our cute family, we are happy to have you here with us!~hugs~

53
by devon 07 Jul 2015

Great job we have one that fits like this too.

2 comments
pldc by pldc 08 Jul 2015

This is from your RV posting I saw that you made a blue one for your picnic table so I had to make mine too! Thank you so much for showing your RV! I love this & have had many compliments out @ camp because of mine! A great idea DeVon thank you!~hugs~

72397
by cfidl 07 Jul 2015

Good idea about the elastic! Excellent stitching!

1 comment
pldc by pldc 07 Jul 2015

Thanks Christine very much. ~hugs~

173580
by jrob Moderator 07 Jul 2015

Good job, no more splinter britches.

1 comment
pldc by pldc 07 Jul 2015

lol too right. Thanks Jerrilyn, ~hugs~

158553
by chenille 07 Jul 2015

Thanks for this! Excellent project.
Hugs, Nadyne

1 comment
pldc by pldc 07 Jul 2015

Nadyne your very welcome & thank you too. ~hugs~

24424
by sonjapotgieter 07 Jul 2015

Great and hard work done!!!Stunning...

1 comment
pldc by pldc 07 Jul 2015

Thank you very much Sonja, ~hugs~

65926
by designgirl 07 Jul 2015

That is a nice tablecloth and bench covers. Great instructions, thanks.

1 comment
pldc by pldc 07 Jul 2015

Thank you so very much Lynn, ~hugs~

51302
by marianamin2003 07 Jul 2015

Great job! Thank you for the detailed instructions.

1 comment
pldc by pldc 07 Jul 2015

Thank you for telling me that I was worried about not explaining them very well. ~hugs~

2822
by pennifold 07 Jul 2015

These look wonderful Loralye and your instructions are just PERFECT! I hate going to parks and having rough wood, or food from previous picnickers or bird poo on the benches. I loved your comment about keeping them also "hot" seat proof. I've burned my bottom a few times forgetting that the bolt and nuts etc. are hot!!!! Love your work. Love Chris

2 comments
pennifold by pennifold 07 Jul 2015

P.S. I've got one of those toggle things on my privacy cover in my boot (I think you call it the trunk). It holds onto the cover when you open the back door of my car. When the door is shut it hides anything in the back of your car. The reason I've got one of these is one broke and we haven't replaced it with the proper toggle!!!!! A bit lazy isn't it? he he he!

pldc by pldc 07 Jul 2015

Thank you Chris so much do to so little time lol, sounds like a good temporary fix. ~hugs~

234253
by Leaha 06 Jul 2015

Great idea and very pretty. Makes eating much more fun on such cheerful seats and table.

1 comment
pldc by pldc 07 Jul 2015

Leaha thank you very much, ~hugs~

35301
by highlandermom 06 Jul 2015

Great looking and I am sure much better feeling.

1 comment
pldc by pldc 07 Jul 2015

thank you very much Mary, & it sure is lol ~hugs~

86901
by dragonflyer 06 Jul 2015

Great job...looks like smooth sitting for you!

1 comment
pldc by pldc 07 Jul 2015

lol thank you very much, ~hugs~

313835
by noah 06 Jul 2015

Nice work my friend hugs

1 comment
pldc by pldc 07 Jul 2015

Many thanks Carolyn, ~hugs~

360401
by Smokey12 06 Jul 2015

You can definitely think outside of the box. This is brilliant and love your blue pattern. And it is sew easy. Your directions are very easy to follow. I would have never thought of such a thing but it is very useful and needed at the campsites. I have to show this to my DH ad see if he wants me to make some. Thanks for posting. Hugs

1 comment
pldc by pldc 07 Jul 2015

thank you very much, & thanks for letting me know my instructions are ok I was worried I didn't explain it right ~hugs~

10990
by dailylaundry 06 Jul 2015

The is terrific!! Thanks for posting the directions!!

1 comment
pldc by pldc 06 Jul 2015

your very welcome Laura I hope that you could understand them ok? ~hugs~

95274
by tlp22 06 Jul 2015

Wow your one smart cookie..Looks fantastic!

1 comment
pldc by pldc 06 Jul 2015

It may be made better by someone with more experience but this works well for camp. Thank you very much for your vote of confidence ~hugs~

18102
by lbrow edited 06 Jul 2015

They look really nice . I hate sitting on rough benches,something always gets pulled or torn. This way it's a pleasure to sit on./Lillian

1 comment
pldc by pldc 06 Jul 2015

& no slivers either, & it is so much hotter to sit on the wooden bench too & no one will get burned by the bolts near the end of the seats either. An all around better option. Thank you very much Lillian. ~hugs~

145789